Holiday air travel means chaotic terminals, long security lines, and at least one gate change you didn't see coming. While your iPhone can't make the crowds disappear, it can take a surprising amount of friction out of the trip, from the airline check-in process all the way through TSA and customs.
Using your iPhone to create digital boarding passes and IDs, manage travel eSIMs, track AirTags in your checked luggage, and access the Mobile Passport Control app saves you a ton of time when traveling.
The catch is that these features must be set up before you leave home. Start with the checklist below, then read on for how each one works.
Before you leave home: Your iPhone airport hacks checklist
- Add your boarding pass to Apple Wallet and turn on its Live Activity.
- Add a Digital ID or driver's license to Wallet, and pack your physical ID anyway.
- Set up a travel eSIM if traveling abroad so your phone works right when you land.
- Put an AirTag in all checked luggage.
- Download the free Mobile Passport Control app if returning from an international trip.
1. Digital boarding passes in Apple Wallet let you skip the line at check-in
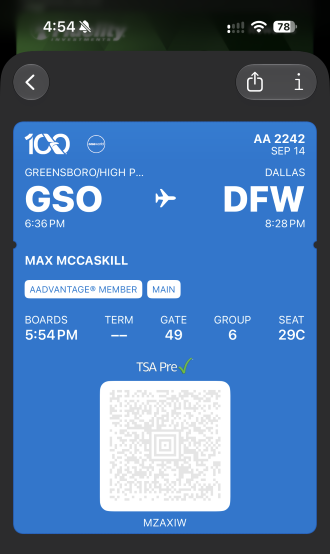
Image: Max McCaskill
Mobile boarding passes in Apple Wallet are no longer just something to scan before you board the plane. On participating airlines, your pass updates itself with gate changes and delays, shows your flight status as a Live Activity, and offers links to eligible airport maps. You no longer need to wait in line for a paper boarding pass or wander around the terminal looking at the departure screens for gate information.
You can also share your flight's Live Activity with someone through Messages, which is perfect for whoever's picking you up. If you're flying solo this season, our guide to iPhone safety settings for traveling alone covers more ways to keep people in the loop while on your travels.
To add a mobile boarding pass to Apple Wallet:
- Check in for your flight in your airline's app or on its website.
- Open or download your digital boarding pass.
- Tap Add to Apple Wallet.
- Tap Add to confirm.
On travel day, the pass will automatically begin to track your gate and flight information on Live Activities. When it’s time to board the flight, simply open your Apple Wallet, tap the boarding pass, and scan it at the gate.
Airlines have to opt in to the upgraded pass, and not all of them have. Once you check in and add your pass to Wallet, you'll see right away whether yours supports it. If it doesn't, you can fill the gap with Flighty. It’s a free flight tracking app that I’ve used for years, and it often flags delays before my airline officially does. While the app can’t scan you into your flight, it can track gates, baggage claims, delays, and help you share flight information.
2. Digital ID at TSA checkpoints helps you find a quicker lane
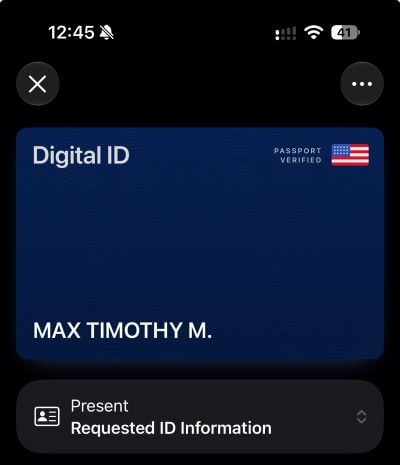
Image: Max McCaskill
For domestic flights, you can tap your iPhone or Apple Watch on the ID reader instead of pulling out your wallet at many TSA checkpoints. You approve the request with Face ID or Touch ID, and you never have to hand your phone to anyone. Digital ID lines are often faster than traditional TSA screening lines, helping you save time.
You can add your driver's license to Wallet if your state supports it, or create a Digital ID from your U.S. passport, which works no matter where you live.
How to add a Digital ID to Apple Wallet
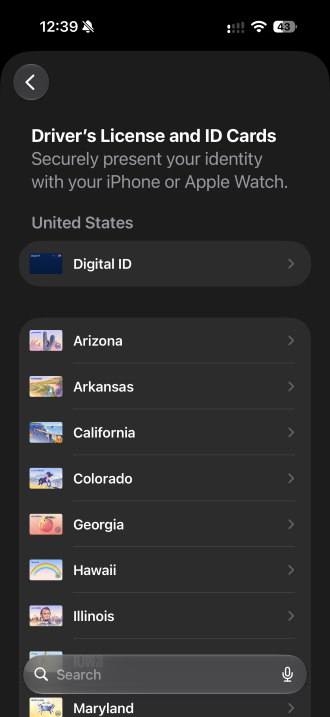
Image: Max McCaskill
Make sure to create your Digital ID at home before you ever head to the airport. To create a Digital ID on your iPhone with your driver’s license or passport:
- Open the Wallet app.
- Tap the Add (+) button.
- Select Driver's License or ID Cards.
- Choose Digital ID (or your state's license, if it's listed).
- Follow the prompts to scan your passport and take a verification selfie.
How to use a digital ID at TSA
Once you arrive at the airport, look for a TSA checkpoint that is using Digital IDs instead of traditional physical cards.
To use your Digital ID at a TSA checkpoint:
- Approach the checkpoint.
- Double-click the side button and select your ID.
- Hold your iPhone (or Apple Watch) near the TSA reader.
- Confirm with Face ID or Touch ID.
- Wait for confirmation from the TSA agent that the scan was successful.
To be clear, a digital ID doesn't replace your physical documents, and not all airports currently support them. Check the TSA’s digital ID page for more details about the service. You’ll have the best luck at major airports, while smaller regional ones will likely still require a physical ID.
Even if going to an airport that supports digital IDs, you must still bring your physical ID. If dedicated digital lanes are closed due to staff shortages or your iPhone messes up, you may not be able to board your flight without the real document.
Does digital ID work with TSA PreCheck?
Yes. If you’re a power traveler with TSA PreCheck or Global Entry, your Wallet ID works the same way in TSA PreCheck lanes, as long as the lane has a digital ID reader. Just make sure your Known Traveler Number is attached to your flight reservation, so PreCheck shows up on your boarding pass.
3. Travel eSIMs give you instant connectivity as soon as you land
If you're flying internationally, a travel eSIM means your iPhone has service the moment you land. You can skip the line at the SIM kiosk in the arrivals hall, text your ride, and head straight to baggage claim.
A travel eSIM adds a data plan for your destination without replacing your regular number. Some carriers also include international data or sell travel passes, so check your plan first. Our guide to preparing your phone for international travel covers both options.
To set up a travel eSIM on your iPhone:
- Buy a plan for your destination from a travel eSIM provider.
- Install the eSIM at home through the provider's app, or go to Settings > Cellular > Add eSIM.
- When you land, turn on the travel eSIM and set it as your Cellular Data line.
4. AirTags show if your bag made the trip and help find lost luggage
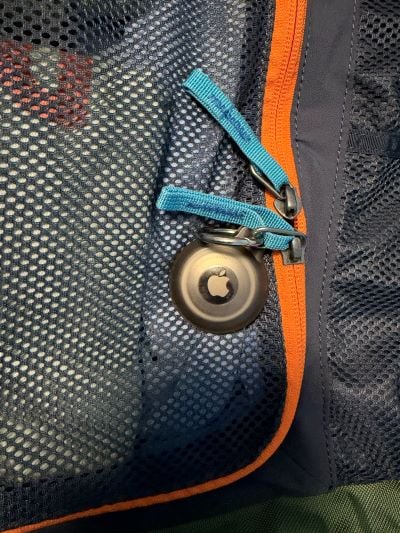
Image: Max McCaskill
An AirTag in your checked bag tells you whether your luggage landed in the same city you did. Once you're off the plane, immediately check your bag's location in the Find My app. If it's at your airport, head to the carousel. If it's still in your connecting city (or somewhere else entirely), go straight to the baggage desk or customer service area. There’s no need to wait an hour at a baggage claim for a bag that will never come.
AirTag locations can be delayed, so give it a few minutes if the location looks stale. If your AirTag last pinged a few hours ago, it may have still made your flight. That said, if the location is actively updating from another location, it probably missed the connection. This kind of instant data is why AirTags make our list of the best iPhone accessories for travelers, and I never travel without them.
How to share your AirTag's location with an airline
If your bag didn't make it, many major airlines accept a temporary link to your AirTag's location when you file a lost-bag report. This can help them instantly locate the bag instead of waiting for it to be found days later. Ask the agent at the baggage desk if the airline can accept it.
To share an AirTag location with an airline:
- Open the Find My app and tap the Items tab.
- Select the AirTag in your missing bag.
- Scroll down to Lost Item and tap Share Item Location.
- Send the link to the airline the way the agent asks.
Airline staff have to sign in to view the link. They'll see your bag's location on a map, along with your Apple Account phone number or email and the AirTag's serial number, but not your own location. The link expires after seven days or once you're reunited with your bag, and you can stop sharing at any time.
5. The Mobile Passport Control app helps you skip slow customs lines for free
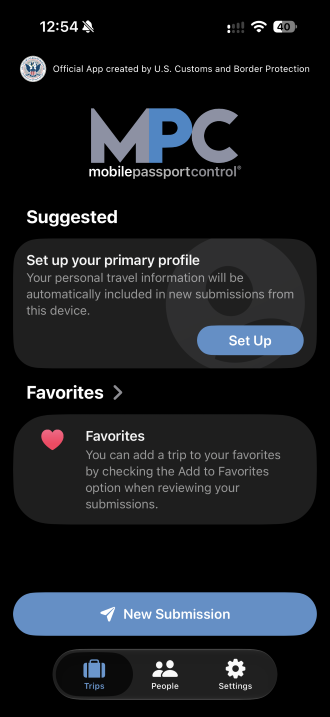
Image: Max McCaskill
If you're flying home from an international trip, the free Mobile Passport Control app can get you into a separate—usually shorter—customs line. There's no application or fee, and it works the same day you download it.
Mobile Passport Control (MPC) is the official U.S. Customs and Border Protection (CBP) app. It replaces the paper customs forms and allows you to complete most of your information in advance, but you'll still show your physical passport to an officer. It’s a travel hack that feels like Global Entry, but it’s free, and most travelers have no idea it exists.
I’ve personally used it to skip massive customs lines at airports in Miami, Charlotte, and Atlanta. While other travelers waited for 30 minutes or more, I used the dedicated MPC line to get through customs and back into the country in less than 10 minutes each time.
The MPC app is available to:
- U.S. citizens
- U.S. lawful permanent residents (green card holders)
- Canadian B1/B2 visitors
- Returning Visa Waiver Program travelers with an approved ESTA
It works at many major U.S. airports, but the dedicated MPC line may not always be open, especially if the normal line isn’t very long.
To use the Mobile Passport Control app:
- Download Mobile Passport Control from the App Store before you leave.
- Create a profile with your passport information. Add anyone in your household traveling with you, since one submission covers up to 12 people.
- After you land in the U.S., answer the customs questions, take a photo of each person in your group, and tap Submit. Only submit once you land, because your receipt is only good for four hours.
- Follow the Mobile Passport Control signs and show the officer your receipt and passport.
FAQ: iPhone airport travel hacks
Does TSA accept a digital ID on my iPhone?
Yes, at select airports for domestic flights. You'll need to use a lane with a digital ID reader, and you should still carry your physical ID.
Can I add my passport to Apple Wallet?
Yes, you can use your U.S. passport to create a Digital ID in Apple Wallet for TSA checkpoints on domestic flights. However, it isn't a true digital passport, so you'll still need your physical passport document for international travel. You will not be allowed to board an international flight without a physical passport.
Is Mobile Passport Control the same as Global Entry?
No, Mobile Passport Control (MPC) and Global Entry are not the same. Mobile Passport Control is a free app that gets you into a separate customs line, where you still talk to an officer. Global Entry is a paid trusted traveler program that requires a background check and interview with U.S. Customs and Border Protection, and it includes TSA PreCheck.
Can I share my AirTag's location with an airline?
Yes, you can use Share Item Location in the Find My app to create a temporary link to your AirTag's location, then send it to the airline when you file a lost-bag report. Many major airlines accept these links.
Max McCaskill
Sr. Staff Writer

Thousands of cell phone plans unpacked. All the facts. No surprises.

Related Articles


Related Topics
iOSPopular Topics
Featured App Reviews iOS News Coverage Device Reviews Device Explainers T-Mobile App Roundups Carrier Explainers